


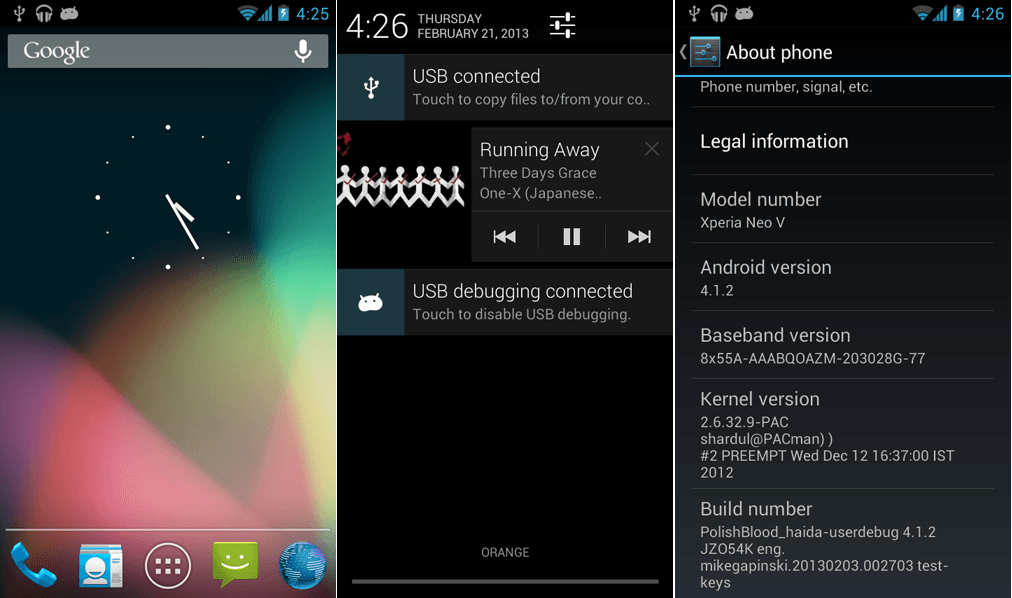
Now we can update Sony Xperia Neo V MT11i and MT11a to the Android 4.1.2 jelly bean. This installation we use AOKP custom ROM. This jelly bean ROM based on the latest AOSP firmware.
AOSP mean Android Open Source Project. AOKP (Android Open Kang Project) ROM gives jelly vanilla experience. It’s not include Google and Sony’s applications. For an instance GTalk, Track ID, Sync and even Google Play Store. This is not an issue. We can install all these Google applications using Gapps zip file.
Sony Xperia Neo V is an older device. This device never receives the jelly bean firmware update. Therefore this is a good opportunity for Xperia Neo V user to use this latest Android version.
AOKP ROM is a highly customizable firmware. It heavily teak for better and smooth performances. In order to follow this upgrade tutorial, you have to unlock the bootloader. But rooting and installing a custom recovery not an issue. Because this Xperia Neo V jelly bean AOKP ROM installation, we install CWM recovery added kernel.
This installation wipes the user data on your phone. Though it’s not touch your micro SD card. Therefore it’s better backup internal memory by following this tutorial contain guide. Apart from that, it’s better make an nAndroid backup using the CWM. In case if you don’t like this AOKP ROM, you can restore previous ROM using CWM.
Warning!
- Unlocking bootloader, installing aftermarket firmware voids the warranty.
- If your Xperia Neo V brick by following this tutorial, I can’t claim its damages.
- This post contains ROM and kernel file only for the Sony Xperia Neo V MT11i/a. Applying it to another phone, will cause unexpected result.
Requirement.
- Backup and sync phone [ with root | without root ].
- Unlock the bootloader [ Guide in here ].
- Install ADB driver [ Guide in here ].
- Charge the phone minimum 50%.
Download.
- Sony Xperia Neo V MT11 Android 4.1.2 jelly bean ROM in here or in here.
- Kernel in here.
- Google application in here.
- Fastboot file in here.
How to install Sony Xperia Neo V MT11 Android 4.1.2 jelly bean update with AOKP custom ROM.
- Unzip the downloaded fastboot file.
- Rename the downloaded kernel file as “boot.img” (without quotes) and save it with the fastboot files.
- Copy the ROM and Gapps zip files into your phone’s micro SD card.
- Power off the phone and wait for a few seconds.
- Press and hold the Menu key and at the same time connect your phone to the PC via USB port.
- Now top LED turn to blue color.
- Then you can see driver installation. Wait for a few seconds to complete the installation.
- Next open the fastboot folder.
- Press and hold the Shift key and at the same time connect your phone to the PC.
- Next you can see the Windows context menu. Click its “Open command window here” option.
- Then Windows CMD window will open.
- Type following command line to install the kernel.
fastboot flash boot boot.img
- When it shows finished, just like the following screenshot, disconnect Neo V from your computer and Power ON.
- When the phone booting, first you can see the kernel boot-logo. Now we need to boot into the recovery. To do that, continually press and release the Volume Down key several times.
- Once you have booted into the recovery first make a nAndroid backup. Navigate to “backup and restore>backup”. It will take a couple of minutes.
- Then go back to the CWM main menu.
- Select “wipe data/factory reset>Yes – Wipe data”.
- Then “wipe cache partition>Yes – Wipe cache”.
- Next “Advance>Wipe dalvik-cache>Yes – Wipe cache”.
- Navigate to “install zip from sdcard>Choose zip from sdcard” and browse the copied Xperia Neo V jelly bean ROM.
- Once you have selected, next choose “Yes – Install”.
- Now CWM start the AOKP ROM installation. Once it’s completed, again choose “Choose zip from sdcard” and install the Gapps zip file.
- After completing the zip file installation, go back to the CWM main menu.
- Select “reboot system now”. First boot takes a couple of minutes.
- Congratulation, you have just installed the Android 4.1.2 jelly bean on your Sony Xperia Neo V.
It’s a better check for a new version in every week. If you download a new AOKP ROM, you can install it without wiping data/factory reset. In case if you need to go back to the previously used ROM. You can restore this ROM installation make nAndroid backup via CWM or TWRP. After restoring completed, next install any suitable kernel via fastboot. This ROM developed by the XDA developer “mikegapinski“.
[Via: XDA forum]
Related posts.
- Sony Xperia Ion LT28i Android 4.1.2 Jelly Bean Firmware Leaked.
- Install Copy Free Android Cloud Backup App.
- Download And Install Beautiful Widgets Free App.
- Extract And Install nAndroid Backup Apps With Data.
- 4 Best Free Android Photo Editor.
![How To Install PACman Android 4.1.2 ROM For HTC One X [ Jelly Bean ]](https://www.androidgadgematic.com/wp-content/uploads/2012/11/HTCone.png "How To Install PACman Android 4.1.2 ROM For HTC One X [ Jelly Bean ]")


