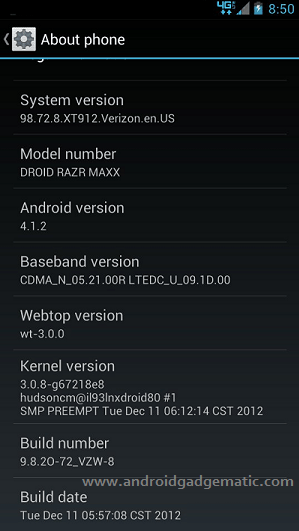
How to manually update or install Motorola DROID RAZR MAXX XT912 to the latest android 4.1.2 jelly bean firmware? Yes, now Motorola just starts rolling out jelly bean updates. You don’t need to wait until you receive the official OTA notification. Using this step by step guide you can update/install android 4.1 jelly bean firmware on your DROID RAZR MAXX XT912.
This manual installation requires the stock recovery with 6.16.211.XT912 firmware. If you’re running older version, just follow this post how to roll back to stock step. This method you don’t need to root and install a custom recovery or unlock the bootloader. Without any pain you can install this jelly bean update.
Waring!
- This update only for the CDMA version of Motorola Droid RAZR MAXX [Verizon].
- Applying this update at your own risk. If your phone brick or damage by following this update tutorial, I can’t claim its damages. We warn you.
Download.
How to update DROID RAZR MAXX to Android 4.1.2 jelly bean firmware manually.
Before apply following steps make sure that, you have the 80% battery life.
- Copy the downloaded file to the SD card.
- Make sure that USB debugging enabled and USB connection is MTP.
- If you already have the root permission, install the OTA RootKeeper from the Play store and protect the root permission. Its a free app (Tap “Protect root” button, grant the superuser permission. After that make sure that “Protected su copy available” checked, reboot the phone. Once phone boot up open OTA rootkeeper and tap “Temp unroot“).
- Power phone off the phone and wait for a few seconds.
- Boot into the stock recovery by pressing and holding the “Power, Volume Up and Down” keys at the same time, until you see the boot screen.
- When you see the boot screen release the pressed keys and go to the “Recovery” option.
- To boot in the recovery press the “Volume Up”.
- When you see the “Android and exclamation”, press the “volumes up and down” keys at the same time.
- Select “install update from external storage” and choose the copied file update zip file and press the power button.
- Normally the updating will take few a minutes (10-30). Its normal.
- Once the phone boot-up open the “OTA Rootkeeper” and tap “Restore root” or extract the downloaded “Root restore.zip” and double click on the “FixRoot.bat” file.
- Fails to get the root permission, now worry, you can follow “Root Motorola DROID RAZR MAXX XT912 Android 4.1.2 Jelly Bean” tutorial.
How to go back to the stock.
Before install the jelly bean update, you have to be on the stock firmware with stock recovery. Using this tutorial, you can install android 4.0.4 ICS.
- Power off and boot into the fastboot mode by press and holding volume and power button at once.
- Download and extract the “Droid Razr toolkit” in here.
- Double click on the “DroidRAZRUtility.bat “file.
- When the Windows CMD window opened, type 1.
- Wait until the installation complete.
- Once it’s completed, you’re in the stock firmware with stock recovery.
- Once phone boot up make sure that you have enabled “USB connection mode to “MTP” and enable USB debugging (Settings>Developer options).
- To root the phone run the downloaded toolkit contain “DroidRAZRUtility.bat” and select the option 2 (press 2 on your keyboard).
- Now your phone will be rooted.
- You can now follow the above firmware installation.
Related posts.
- How to root Samsung Galaxy S 3 (S III ) Mini I8190 Android 4.1.1 without increase flash counter.
- Sony Announced official Android 4.1.Jelly Bean update receive Xperia devices list [Xperia U, Miro, Tipo, Sola not receive].
- Fix custom ROM installation ” Status 7 “,”error, assert failed: getprop (‘ro.product.dervice’) ,”installation aborted” recovery error easily.
- Install ASUS Eee Pad Transformer Prime TF201 Android 4.1.2 CM10 Jelly Bean ROM.
- Root Motorola DROID RAZR MAXX XT912 Android 4.1.2 Jelly Bean Firmware [ How To]


