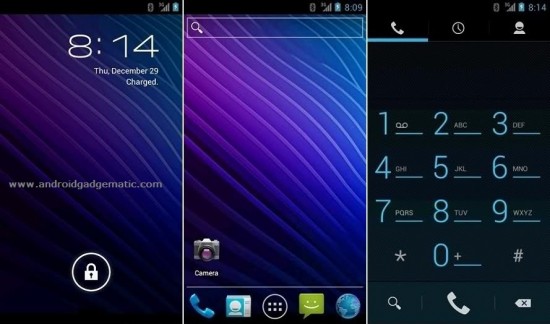
Now we can install Android 4.0.4 ICS CyanogenMod 9.1 ROM on Sony Xperia S Lt26i. Cyanogen is a free, community built custom ROM for various Android phones and tablets. This after market firmware gives pure android experience. It’s based on the AOSP (Android Open Source Project).
Like other ROM’s, this one also not available Google apps such as play store, Gmail. Therefore you have to install them separately. This post I provide Gapps downloadable link. Moreover Sony’s applications such as Walkman player, camera apps are not available. Some of them can find on the Google play store.
This installation we need to unlock the Sony Xperia S bootloader. Because if we need to use a CM 9.1 kernel. But rooting is an optional. This kernel (boot.img) has CWM based recovery.
Warning!
Installing custom ROM’s, void your phone’s warranty. If your Xperia S bricked by the following guide, I can’t get its risk. Applying this method at your own risk. If anything goes wrong, you can fix it by following this tutorial.
Downloads.
Requirements.
- Unlock bootloader [Guide in here].
- Backup internal memory [ With root | Without root].
How to install Sony Xperia S LT26 Android 4.0.4 ICS CM9.1 ROM.
- Transfer the downloaded CM9.1 Xperia S ROM and Gapps into your Xperia S internal SD card.
- Reboot into boot loader mode, to do that disconnect phone from the PC and wait for a few seconds. Press and hold volume up key and same time connect the phone to the computer via USB cable.
- Wait for a few seconds, if drivers installation starts wait till it’s complete. When you’re in the fastboot mode, your phone’s LED turn to blue color.
- Extract downloaded fastboot files to the desktop.
- Get the CM9 ROM include “boot.img” file and save it in the fastboot folder.
- Open fastboot folder and press and hold “Shift” key on your keyboard and same time right click inside the folder.
- In the windows context menu click “Open Command Prompt here”
- Type following command line in the CMD window.
fastboot flash boot boot.img
- When the CMD window display “finished” message just like following screenshot, disconnects phone from the computer and power ON.
- Now reboot into recovery mode. To do that, when you see the kernel boot logo as soon as LED turn to blue, continually press and release volume UP key.
- Now you’re in the recovery mode. Before the installation we need to clean the cache, dalvik-cache, user data and backup the existing ROM.
- To Wipe user data go to “wipe data factory reset>Yes delete all”.
- To delete cache, navigate to “wipe cache partition> Yes–wipe cache”.
- To clean dalvik-cache select “Advanced> wipe dalvik cache>Yes– delete”.
- Go to backup and restore and select “backup”.
- Go to “Install zip from sd card>choose zip from sd card” and select the downloaded CM9 ROM.zip file.
- Select “Yes– Install”.
- When the installation has completed, again select “Choose zip from sd card” and select the downloaded Gapps zip file.
- When the installation has completed reboot the Xperia S. First boot takes few minutes.
Related posts.


![Install Android 4.1.2 Paranoid Android ROM Sony Xperia T LT30 [ Jelly Bean ] Install Android 4.1.2 Paranoid Android ROM Sony Xperia T LT30 [ Jelly Bean ]](https://www.androidgadgematic.com/wp-content/uploads/2012/12/2012-12-05_2130.png)


