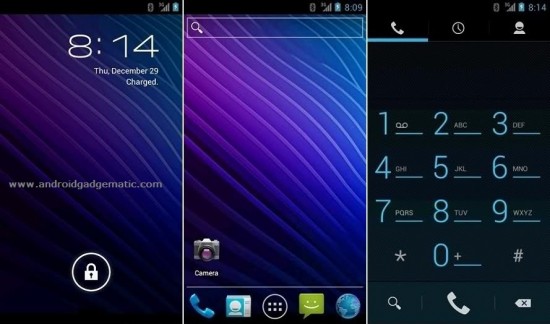
Sony Xperia Ray, Neo, Neo V, Arc, Arc S user can now install Android 4.0.4 ICS CyanogenMod 9.1 custom ROM. CyanogenMod also called as CM, it’s one of the popular custom ROM distribution for android user. This is not an official release, but it’s more stable.
CM9.1 not includes Sony’s stock apps such as panoramic camera, Xperia gallery, etc. Sony Xperia Ray, Neo, Neo V, Arc, Arc S series ROM’s developed by the Free Xperia Project team. It doesn’t include Google’s apps such as play store, Google calender, sync, etc. Therefore you have to install Gapps after ROM installation completed. This tutorial includes all of these steps with download links.
Warning!
Rooting, unlocking bootloader, flashing custom ROM’s void your phone’s warranty. If your device bricked by following this method, I can’t get its risk. Applying this method at your own risk.
Requirements.
- Unlock the bootloader [Guide in here ].
- Charge the phone minimum 50%
- Install ADB drivers [ Guide in here ].
How to install Android 4.0.4 ICS CM9.1 ROM Sony Xperia Ray, Neo, Neo V, Arc and Arc S.
- Extract downloaded fastboot.zip file to your computer desktop separate folder.
- Extract the CM9.1 ROM includes boot.img (kernel) file and save it in the fastboot folder.
- Rename the copied “.img” file as “boot.img” without quotes. (If it has another name)
- Copy downloaded the ROM and Gapps into your phone’s SD card.
- Disconnect phone from the computer and power off. Wait for a few seconds.
- Now we need to boot into fastboot mode. To do that press and hold your phone’s menu key and same time connect the phone to the PC via USB cable. If windows start driver installation wait until it’s complete.
- If the top LED turn to blue your in the fastboot.
- Open fastboot folder and press and hold the “Shift” key on your keyboard and same time right click inside of the folder.
- In the windows context menu select “Open command window here”.
- Type following command in the CMD window.
fastboot devices
- Now it displays your phone’s serial number.
- Type following command right after that.
fastboot flash boot boot.img
- Wait for a few seconds to complete the flash. When it displays you can type the following command.
fastboot reboot
- Before the flash CM9.1 ROM, it’s better perform a nandroid backup. To do it we need to reboot into recover. When you see the “Free Xperia Project” boot logo continuously press and release volume down key to boot into recovery.
- When the CWM based recovery appear, go to “backup and restore>backup” now your existing ROM and its backup data into your SD card “clockworkmod” folder.
- After backup completed, go to the main menu using back key or back menu.
- Before starting CM9.1 installation we need to clean the phone data, cache, etc.
- Delete all the user data by navigating “wipe data/factory reset> Yes–Wipe user data.
- Then we need to delete cache partitions “wipe cache partition>Yes–Wipe cache”
- Next delete the dalvik cache by navigating “Advanced>Wipe dalvik cache>Yes”.
- Now we start ROM installation to do that select “Install zip from sd card>choose zip from sd card” and select the downloaded ROM zip file and select “Yes–Install xxxx xxxx.zip”.
- Wait for a few minutes to complete the installation.
- When it displays “Install completed”, again install the Gapps.
- Now go back to the main menu and reboot the phone. First boot takes few minutes.
- You can check for a new version on your phone. Go to “Settings>About phone>CyanogenMod Update”. If there’s a new version, you can install it. When you’re updating existing ROM, you don’t need to wipe data, but you have to install the kernel and Gapps zip file.
- Install Android 4.1 Jelly Bean CM10 Custom ROM Sony Xperia Ray, Neo, Neo V, Arc, Arc S.
- Fix Accelerometer, Compass Revert Issues On Custom ROM.
- Check Android Phone, Tablet Sensor Work Properly.
- Calibrate Android Phone, Tablet Battery [ No Root, With Root Calibration ].
- How To Use Android ADB Over Wifi Without USB Cable.


