


Create a 2nd partition on Android phone’s micro SD card is a good method for the internal memory out of memory issue. Currently android phone has lower internal memory for install applications. As a result of that we can’t install all of our favorite apps. Though now we can completely move all the installed apps to the micro SD 2nd partition.
For instance, we can use Link2SD type root app to move apps to SD card’s 2nd partition. If you use that kind of application, when you mount your SD card to a computer, android mount its first partition, so you can use your external memory apps without any issue. This post I’m going to show you how to create a secondary partition on your SD card without loosing its data. I use “MiniTool” windows software for this process.

When I’m testing, I used my older SD card, but its data not wipe or corrupted. However I recommend you to backup all the data on your SD card.
This process no need to connect your SD card to a separate card reader, you can use it using your phone. But you need to enable change USB connection mode as “Mass Storage mode (MSC)” using your phone’s settings.
Warning!
I’m not responsible dead SD cards. Applying this tutorial at your own risk.
Requirements.
- Backup all the files, data and apps on your SD card ( Guide in here ).
- Change USB connection mode as “Mass storage mode (MSC)”
- Download and install “MiniTool Partition Wizard Home Edition” on your windows computer ( it’s free )
- After you created a secondary partition, every time when you connected your phone into a computer, Android will mount first partition and windows not recognize 2nd partition as a removable disk.
- Your files, phone’s camera images will be saved on 1st partition. So when you are creating a 2nd partition, give more space to the 1st partition.
- In-addition to that, your phone will be displayed your 1st partition size as the SD card size. 2nd partition is completely hidden to the user. As I mentioned earlier, this new partition can only recognize Link2SD type special apps.
How to create a secondary partition on micro SD card.
- Connect your phone to the computer via USB cable.
- Run the MiniTool Partition.
- Mini tool now displays your SD card under “Disk 2”. If it’s not displaying your SD card go to its “General>Relocate Disk Information“/ Then on your phone verify you enable “Mass Storage Mode” .
- Select your SD card and click “Move/Resize”.

- Now “Move/Resize window” will open, in its “Partition size” select your first partition size. It will use for saving all your stuff. For instance if you have a 1 GB SD card and you select 200MB, your first partition is 200MB. (First partition will save your media files, camera photos, etc. )

- Click “OK”
- Now select “Second partition” by click on it.
- Click “create” button at the top of the “Mini tool” window.

- In “Create new partition” windows, under the “label” type a suitable name, “Create as” select “Primary” and change file system as “ext2, ext3, FAT 32, or swap partition” and select desire driver letter. ( Note! Some device can’t detect FAT 32/16 as system file so if its fail to detect second partition again change the file system as ext2or ext 3)

- Click “OK”
- Now click “Apply” and “Apply Changes” dialog click “OK”.

- Wait for a few seconds to complete this process.
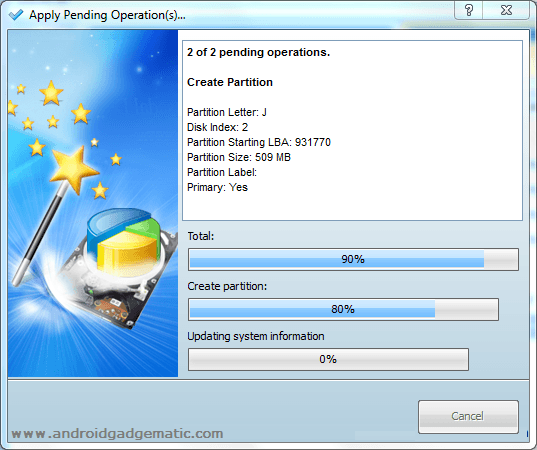
- If you receive “Apply all the pending changes successfully” you have done.

- Click OK.
- Disconnect your phone from the PC and restart your phone.
You just finished. Now you can change your phone’s “USB connection mode” as “Media transfer mode (MTP)”.
Now you can completely move your phone apps to this new partition using our “How to completely move android apps to SD card second partition with root” post. It’s more effective than the native apps2SD method.
Related posts.

![How To Print From Android Phone, Tablet [ Cloud, WiFi, Bluetooth, USB ] Docs, Pictures, Contacts, SMS, Google Docs, Calender, Call logs](https://www.androidgadgematic.com/wp-content/uploads/2012/05/Print.png "How To Print From Android Phone, Tablet [ Cloud, WiFi, Bluetooth, USB ] Docs, Pictures, Contacts, SMS, Google Docs, Calender, Call logs")


 For Move Android Apps To SD Free)