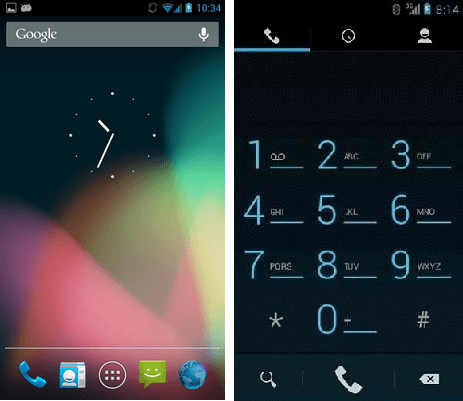
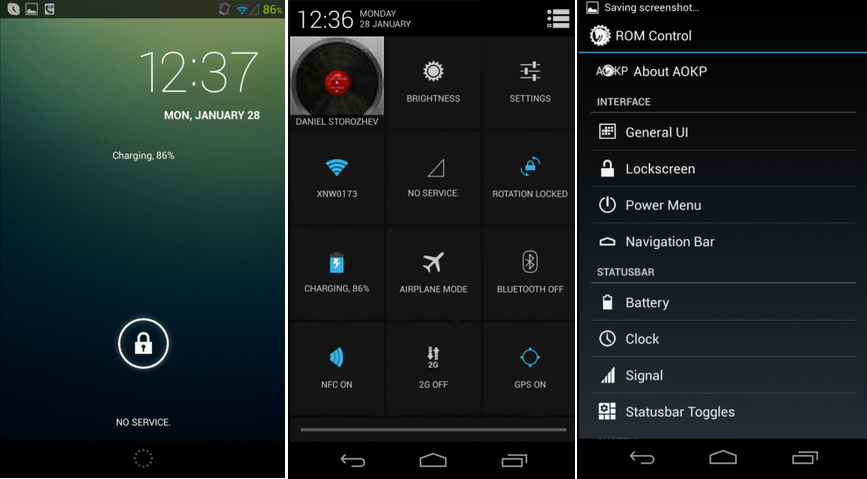
Samsung Galaxy S3 user can install latest Android 4.2.2 jelly bean firmware. This upgrade we use SuperNexus custom ROM. It’s a AOSP (Android Open Source) project based after market firmware. This ROM gives pure Android user experience just like the Nexus devices. It doesn’t include any 3rd party apps. This ROM uses the CyanogenMod kernel.
Like other AOSP custom ROM, SuperNexus ROM not available the Google’s services applications. You can install them using this tutorial contain Gapps zip file. After that, you will receive Google now, Play store, Gtalk, Sync etc cool services.
This Android 4.2.2 SuperNexus installation we need a rooted and CWM or TWRP installed Galaxy S3. This method will wipe all the user data on your phone. It includes Google account log-in details, contacts, SMS and installed app. Though it’s not delete anything on your micro SD card. Before follow this tutorial, better to backup all your data. Moreover, after installed the Android 4.2.2 SuperNexus custom ROM on your Galaxy S3, you can’t see Samsung pre-installed apps.
Before follow this tutorial, it’s highly recommended to make a nAndroid backup. In case if you feel to go back to the previous ROM, you can easily restore the nAndroid backup via recovery.
SuperNexus Android 4.2.2 ROM highly optimized for better performances. It’s available Zipaligned APKs , support Init.d, fully deodexed, EXT4 File system optimizations and many more features. Though it’s not available CM and AOKP type customization options.
Warning!
- This tutorial includes ROM zip file only for the Samsung Galax S3 GT-I9300 (international version). Applying it to other devices cause unexpected results.
- Installing custom ROM voids the warranty. If your phone brick by following this tutorial, I can’t claim its damages. Applying this tutorial, at your own risk.
Requirement.
- Backup your Galaxy S3 phone [Guide in here ].
- Root the phone. [ Guide in here ]
- Install custom recovery such as CWM or TWRP [CWM installation guide].
Download.
How to install Samsung Galaxy S3 Android 4.2.2 Jelly Bean SuperNexus custom ROM.
This installation we can use Clockwork Mod Recovery (CWM) or Team Win Recovery Project (TWRP). Most of the people use CWM, therefore this tutorial based on it. But all the recoveries have similar procedures with little changes.
- Copy the downloaded ROM and Google apps zip files into the internal SD card.
- Power off the phone.
- Reboot into the recovery by pressing and holding “Volume Up, Home and Power” buttons.
- When you see the Samsung boot logo release the pressed keys.
- Go to “backup and restore>backup”. Then your existing ROM and its data will save on the SD card.
- Then navigate to “wipe cache partition>Yes – Wipe cache”.
- Next “wipe data/factory reset>Yes – Wipe data. This step should follow, if you’re coming from an another ROM. When you’re updating SuperNexus ROM, you don’t need to wipe Galaxy S3 user data.
- Navigate to “Advanced>Wipe dalvik-cache>Yes – Wipe cache”.
- Next, time to install the Android 4.2.2 Galaxy S3 ROM zip file. Go to “install zip from sdcard>Choose zip from sdcard” and browse the copied ROM zip file.
- Select “Yes – Install”. SuperNexus ROM installation takes several minutes. Once it’s completed, you are again in the “Apply update from .zip file on” menu.
- Then again select the “choose zip from sdcard” and browse the copied Gapps zip file and install it just like you installed the ROM zip. When you’re updating Super Nexus in the future, you have to again install the Gapps zip file.
- After installation completed, select “reboot system now” option in the main menu.
- Very first boot takes a couple of minutes.
Every week it’s a better check for a new update. When you are updating your Samsung Galaxy S III I9300, you don’t need to wipe anything on your phone. Once you have installed this ROM, I’m not recommending to restore the apk files from your backup. It will cause an unexpected error. SuperNexus developed by the XDA devleoper Faryaab.
[Via: XDA forum]
Related posts.
- Install Android 4.2 Camera App Samsung Galaxy S 3 i9300.
- Install Android 4.1.2 Android Revolution HD Samsung Galaxy S3 I9300.
- Download Pie Launcher For Android.
- 5 Best Free Android Firewall Apps.
- Free Floating Pop-up Video Player For Android.


![Install Samsung Galaxy Note GT-N7000 Android 4.2.1 CyanogenMod 10.1 ROM [ CM10.1 Jelly Bean] Install Samsung Galaxy Note GT-N7000 Android 4.2.1 CyanogenMod 10.1 ROM [ CM10.1 Jelly Bean]](https://www.androidgadgematic.com/wp-content/uploads/2012/12/2012-12-21_2136.png)
![Install Galaxy S 2 I9100 Android 4.2.1 Jelly Bean PAC Man Custom ROM – [AOKP, CM10.1 Paranoid Android] Install Galaxy S 2 I9100 Android 4.2.1 Jelly Bean PAC Man Custom ROM – [AOKP, CM10.1 Paranoid Android]](https://www.androidgadgematic.com/wp-content/uploads/2013/02/Galaxy-s2.jpg)

